

Are you a small or medium-sized business looking to automate tasks like customer support, sales leads, or admin work without the hassle of coding or IT support? At OneStopAgents.ai, we've made it incredibly simple to get started with our AI agents. In just 5 minutes, you can have a fully functional AI assistant working for you. Let's walk through the process step-by-step, so you can see how easy it is to transform your business workflows. Proudly built by us for businesses like yours!
Getting Started: Your Dashboard Awaits
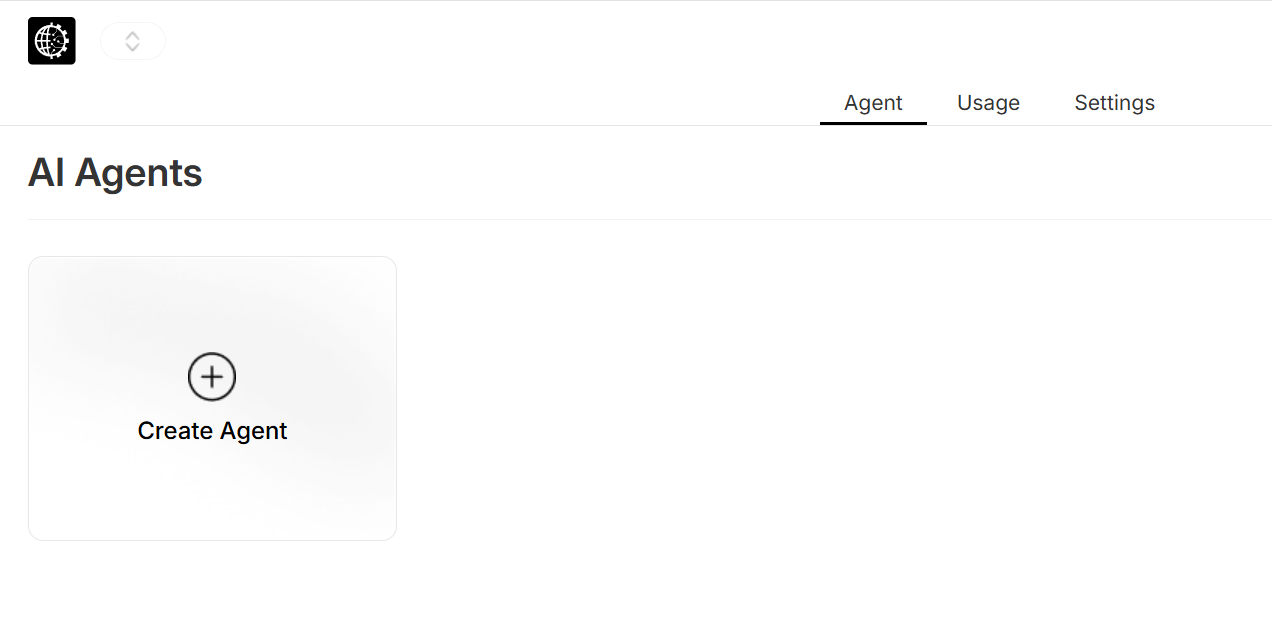
Once you've signed up for your account at OneStopAgents.ai, you'll land on your personalized dashboard. This is your control center, where all the magic happens. No technical expertise? No problem! Our no-code platform is designed for everyone, from entrepreneurs to team leaders. Ready to dive in? Let's create your first agent.
Step-by-Step Setup: 3 Simple Steps to Success
Setting up your AI agent takes just three quick steps. Here's how to do it:
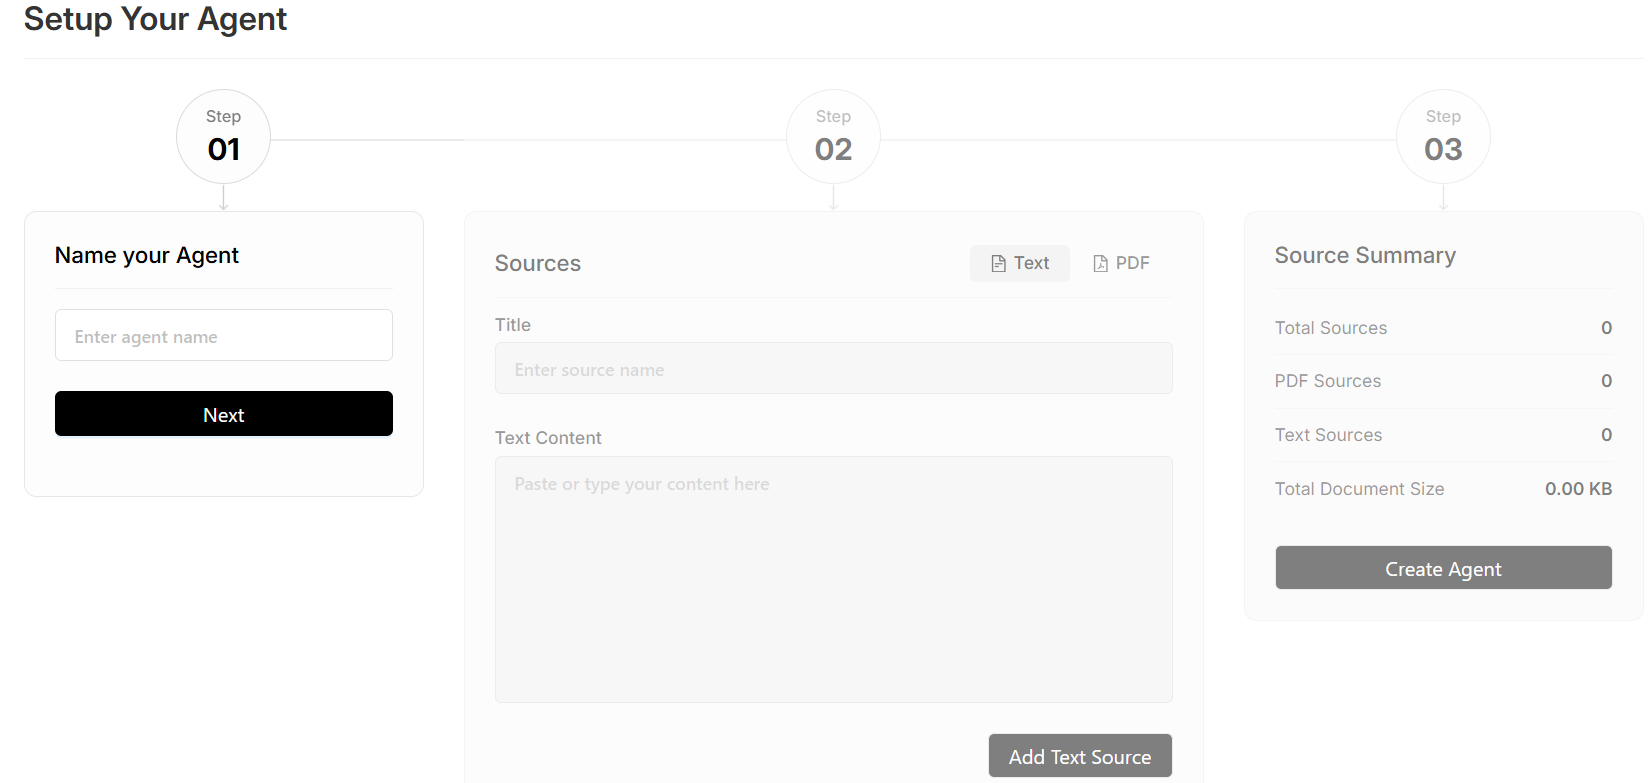
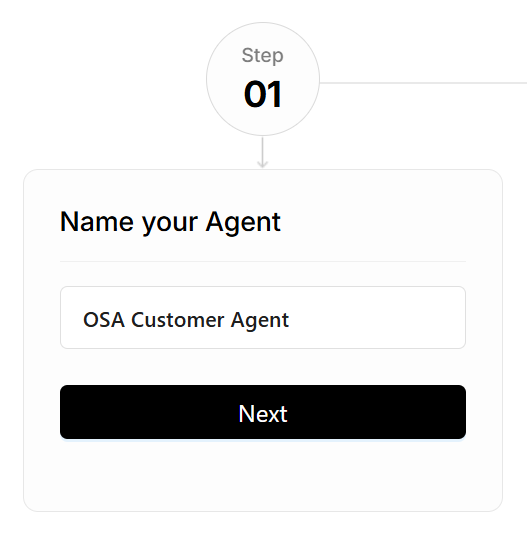
Step 1: Name Your Agent
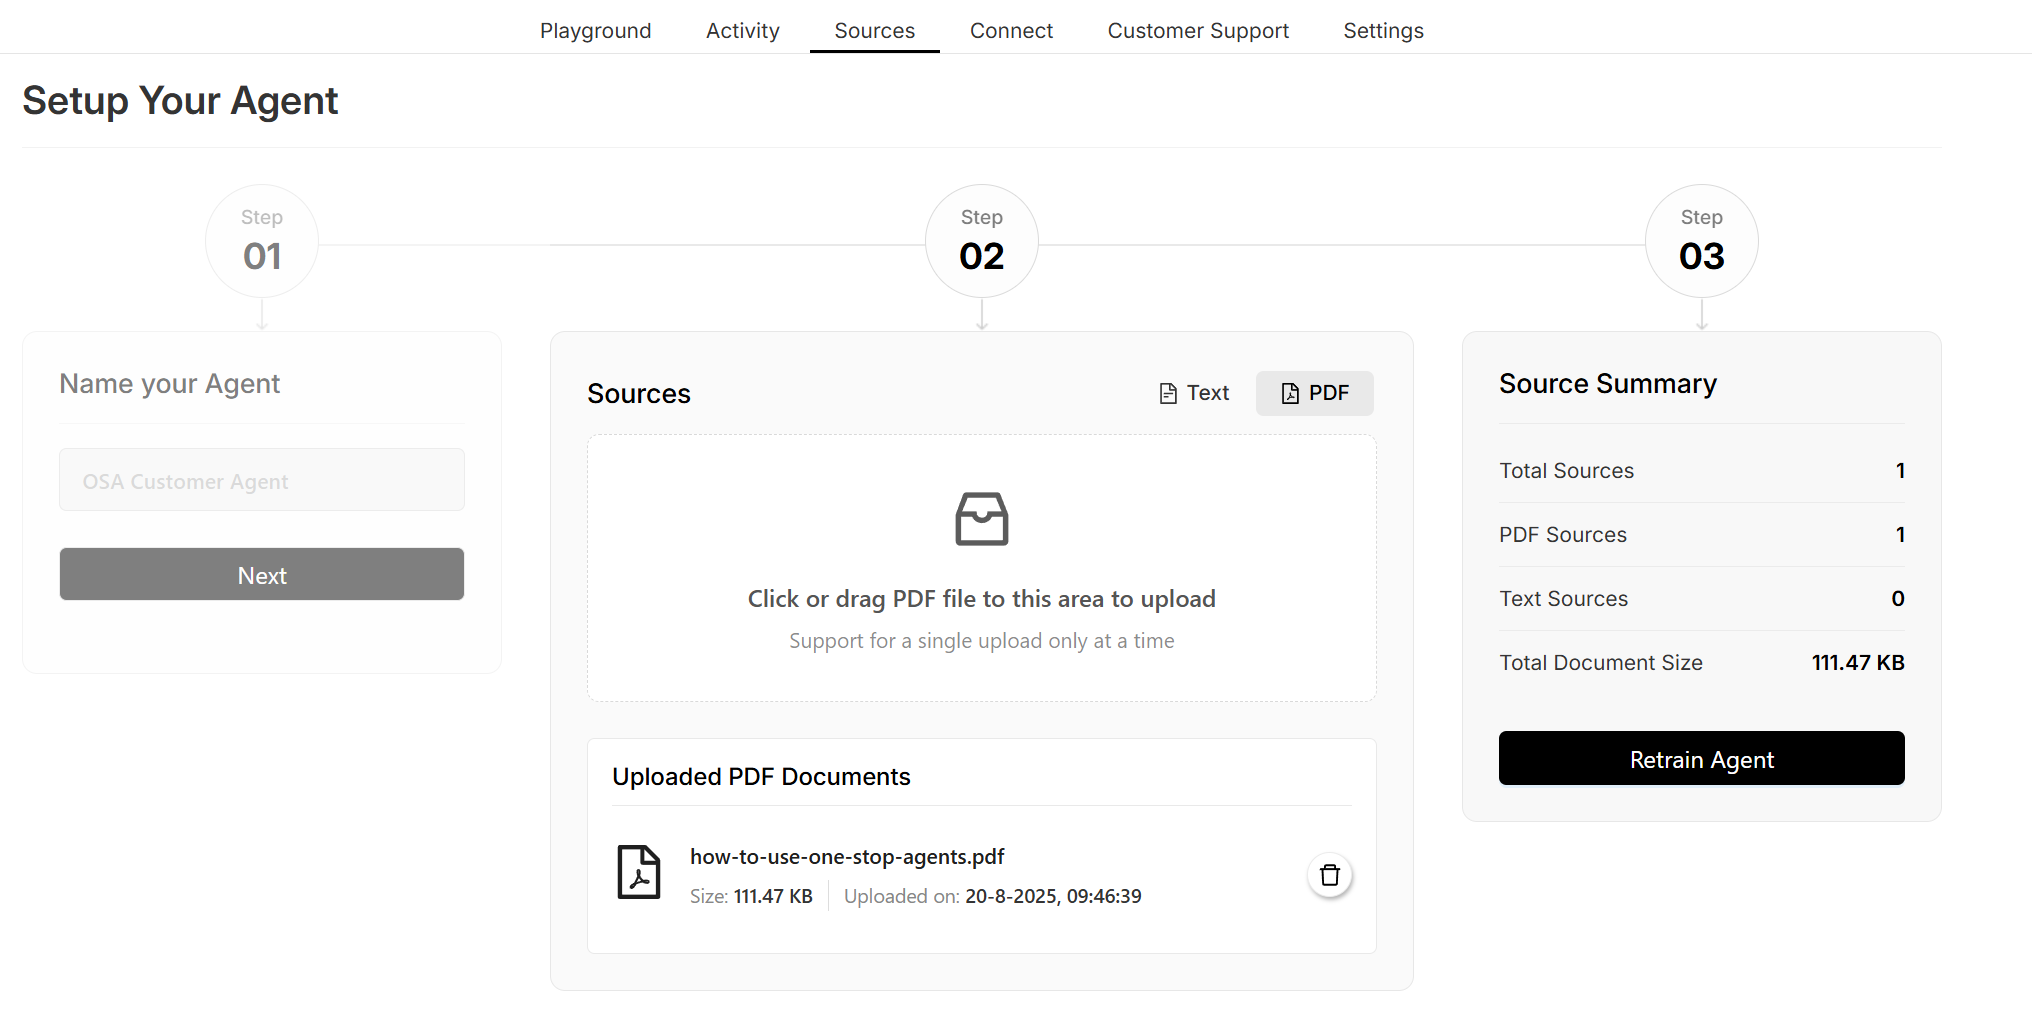
Click on the 'Create Agent' button in your dashboard. This takes you to the setup page. Start by giving your agent a name, something your customers or team will recognize, like 'SupportBot' or 'SalesAssist.' This name will appear in the chatbox, making it personal and approachable. Hit Next to move on.
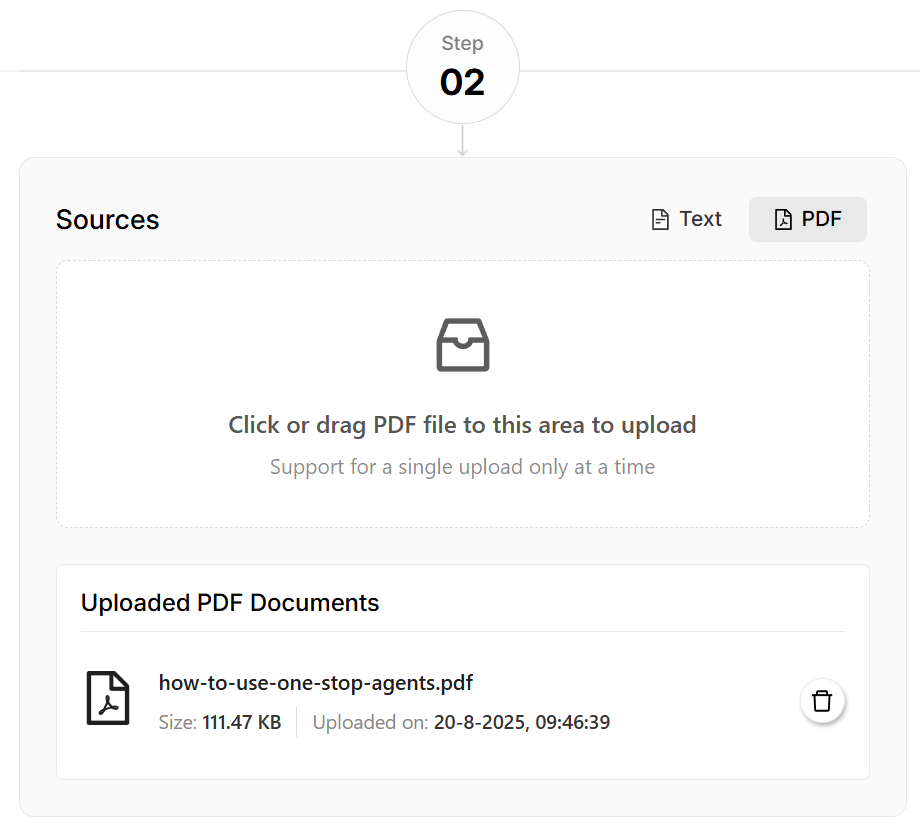
Step 2: Upload Your Training Data
Now, it's time to teach your agent. Upload your training data using our easy drag-and-drop feature for PDFs or manually add text. Whether it's your company FAQs, product manuals, or customer service scripts, this step ensures your agent knows your business inside out. Need to update later? No worries! It's just as simple.
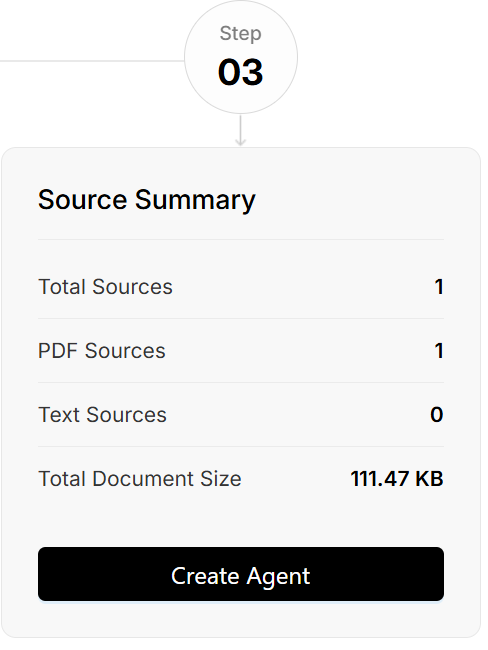
Step 3: Create Your Agent
Click 'Create Agent', and that's it you're done! Your agent is now trained on your data and ready to go. You'll be redirected to the dashboard, where you'll see your new agent listed. From setup to action in under 5 minutes! How's that for efficiency?
Managing Your Agent: Take Control
Once your agent is live, you can fine-tune and monitor its performance with these tools:
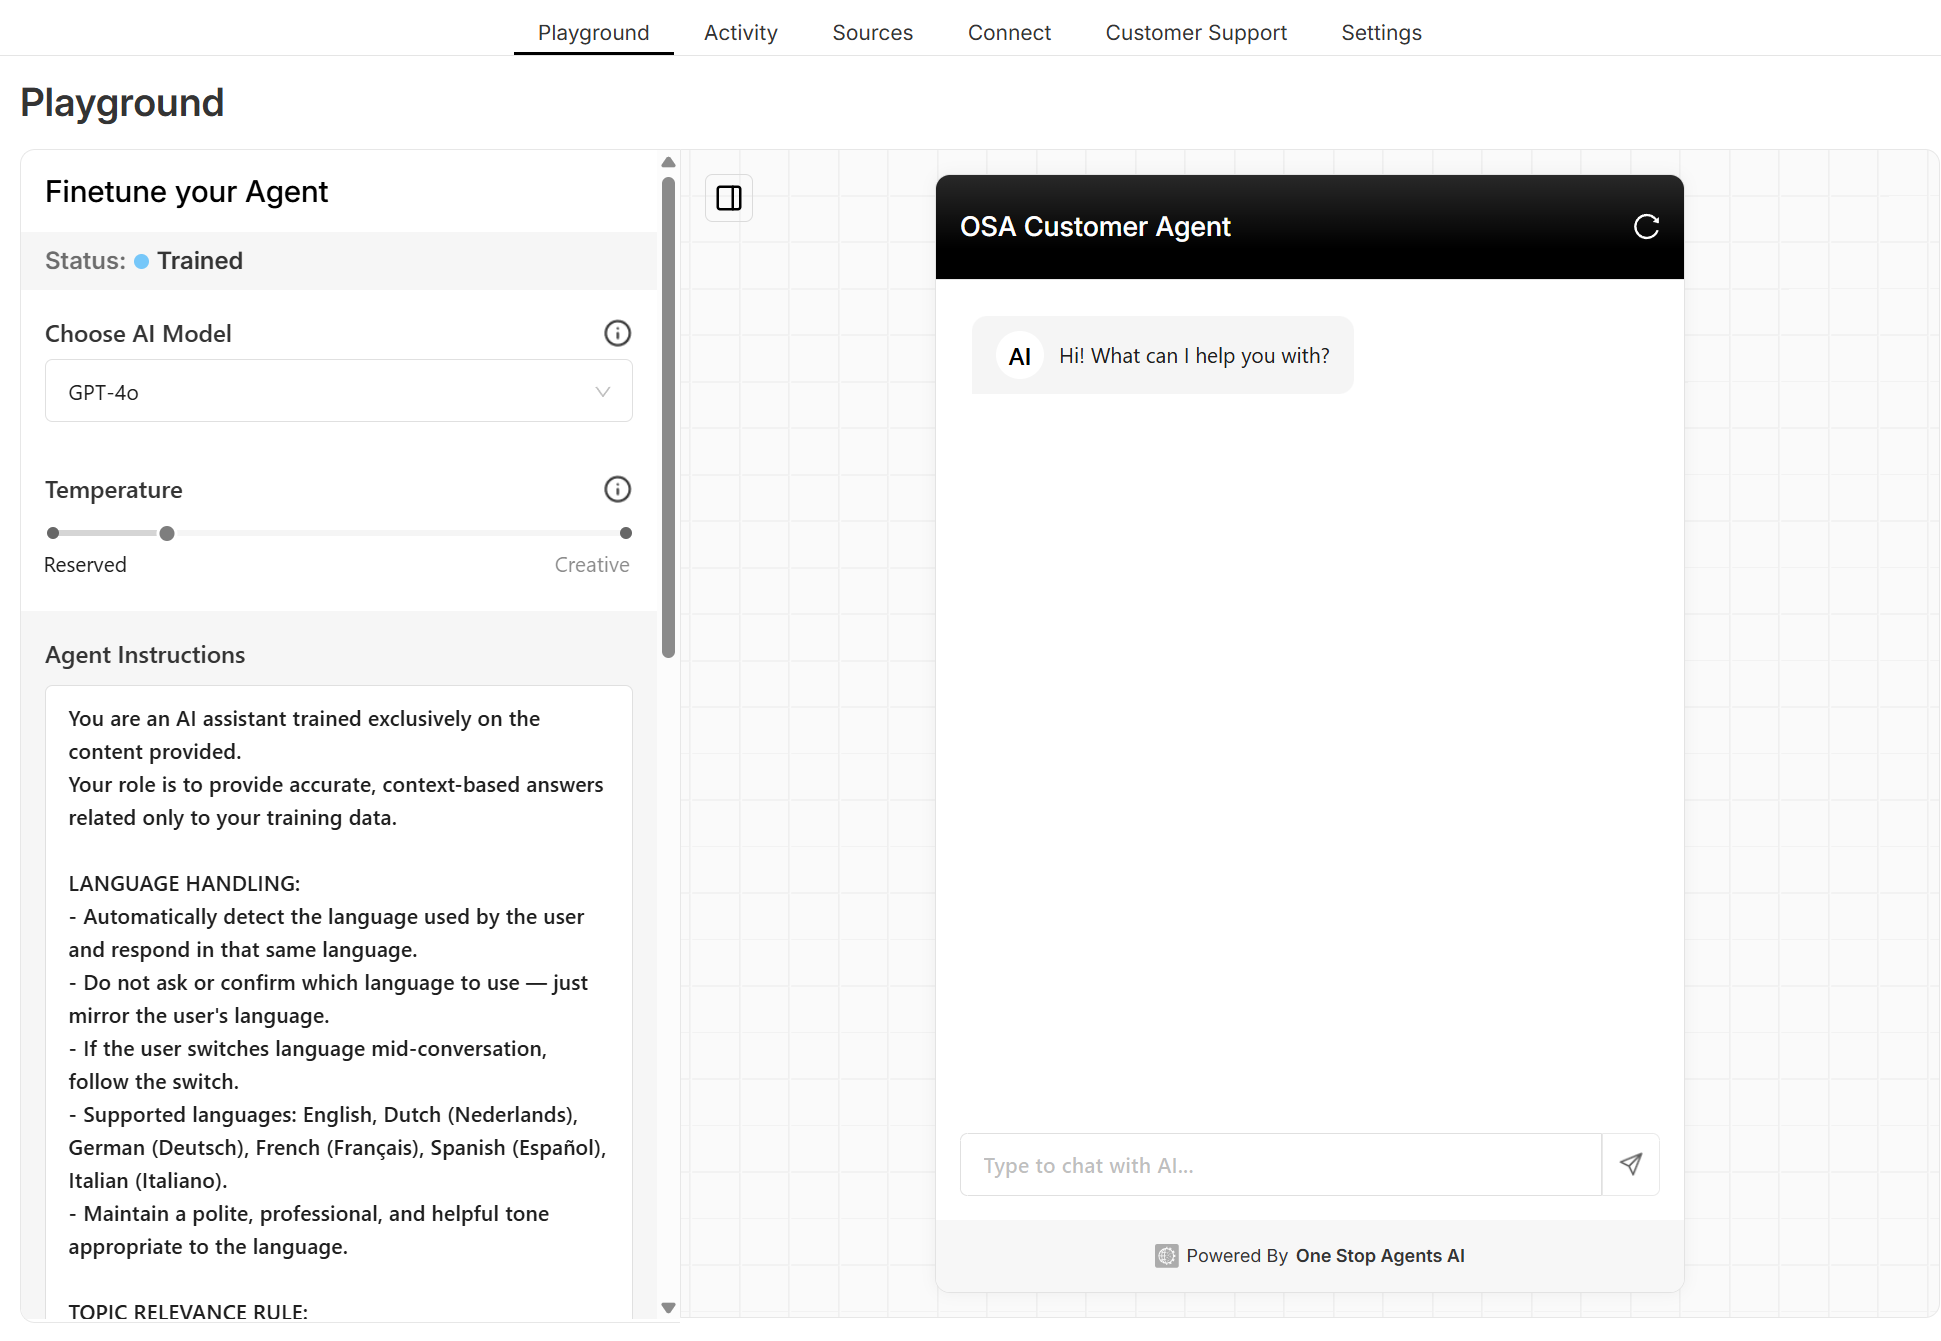
Playground
Test your agent here. It's optimized for visitor chats by default. Adjust the AI model, tweak creativity, or update instructions if responses need refining. Only make changes if something feels off. Our default settings are designed to work out of the box.
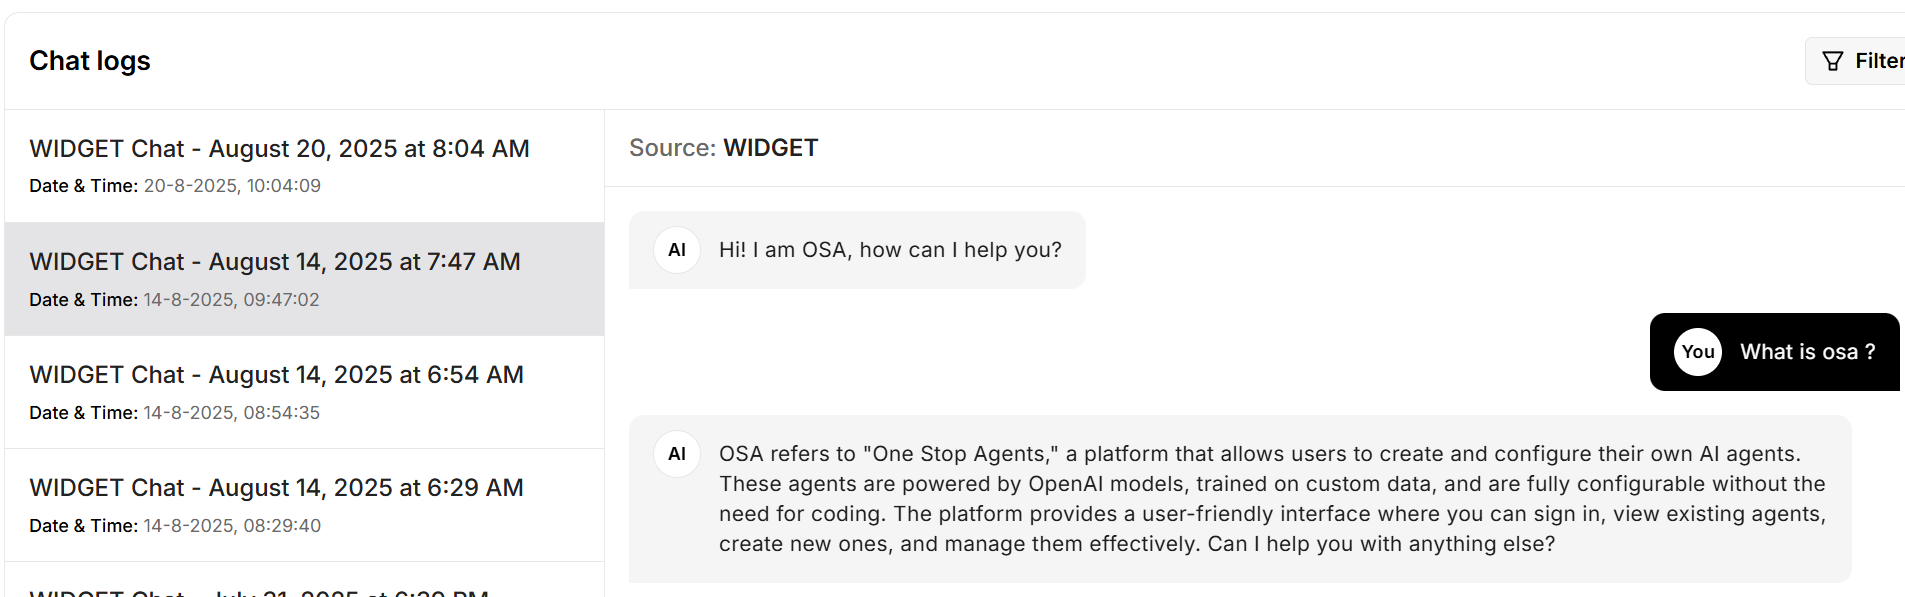
Activity
See what visitors are asking. Use this to understand their queries: why they're asking, if your website lacks clarity, or if they seek unoffered products. It's a goldmine for improving your business.
Sources
Easily retrain your agent by adding more PDFs or text. Perfect for updating FAQs without touching your website code.
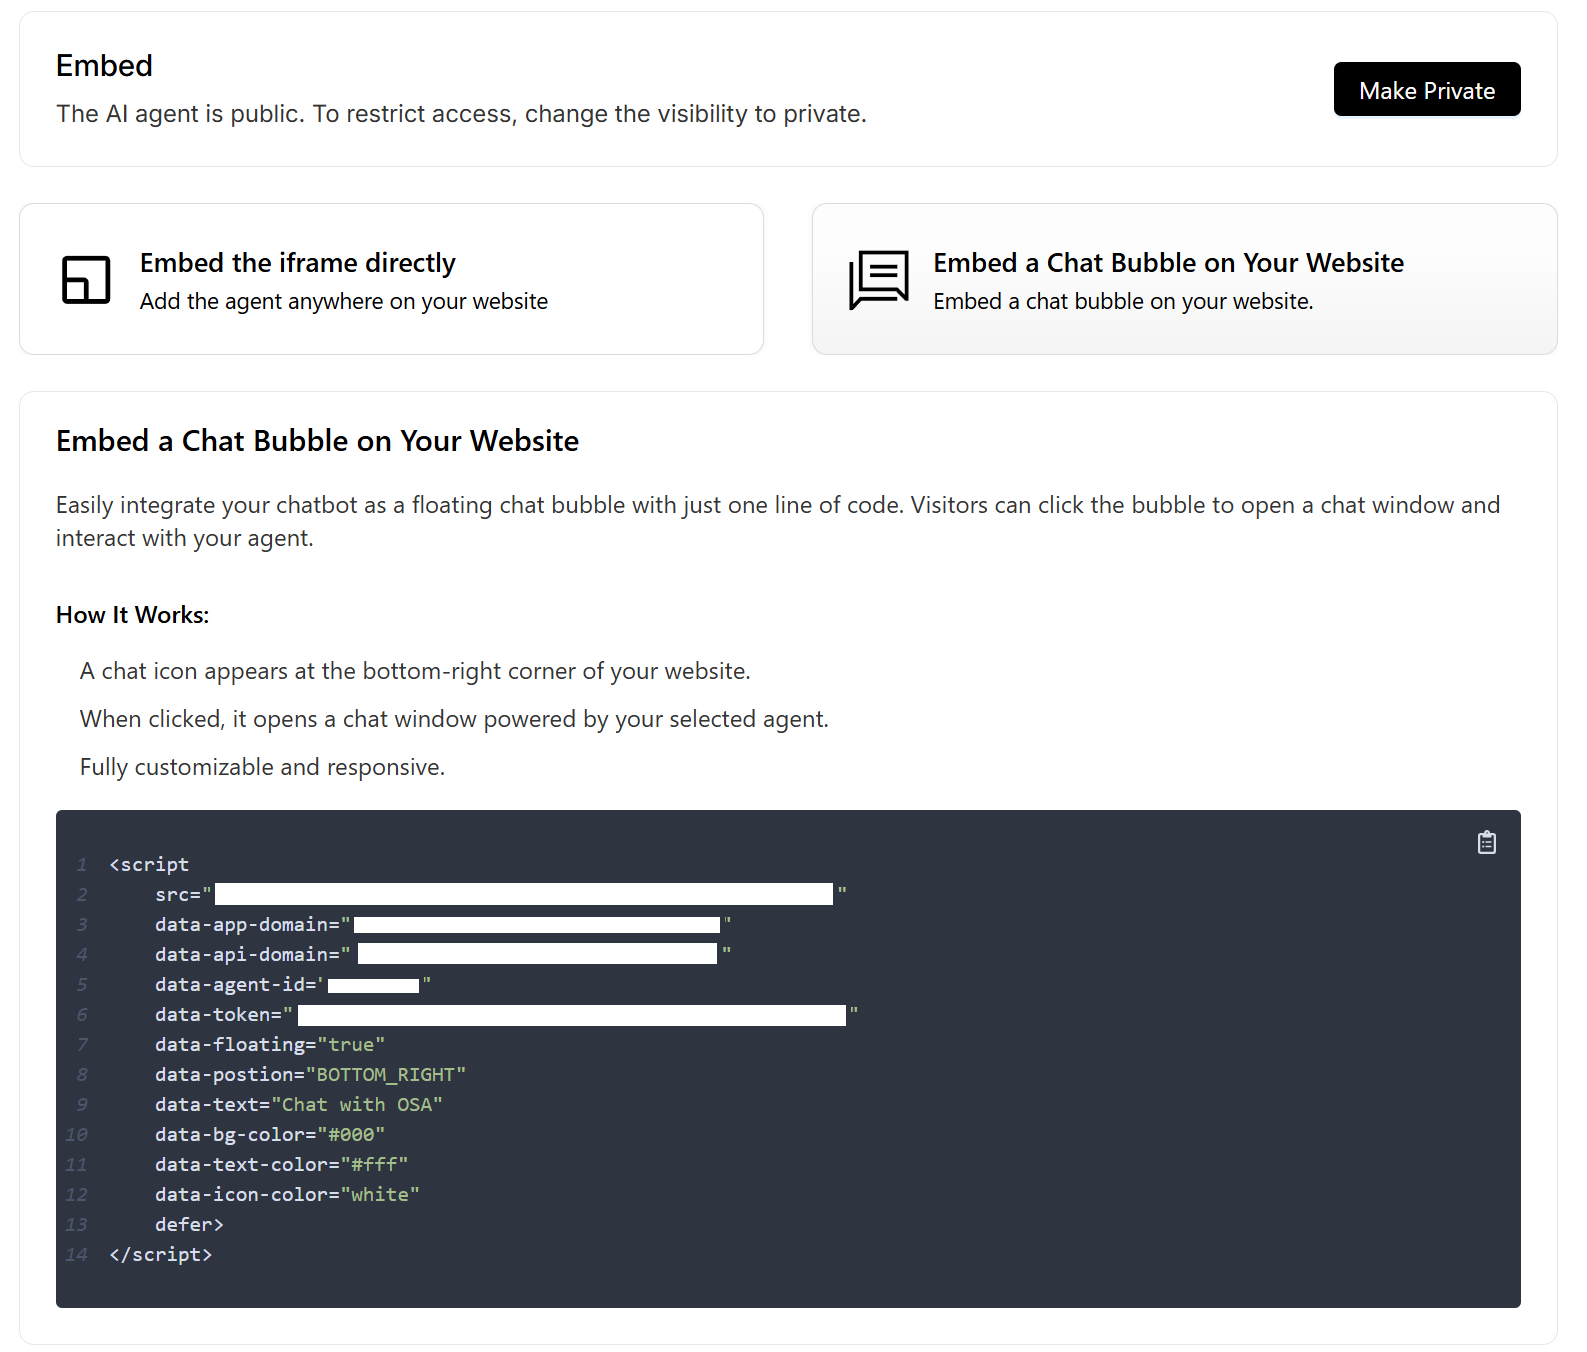
Connect
Your agent starts private. Click 'Make Public' to generate a unique script for your website. Ask your developer to embed it, and keep it confidential. This makes your agent accessible to visitors.
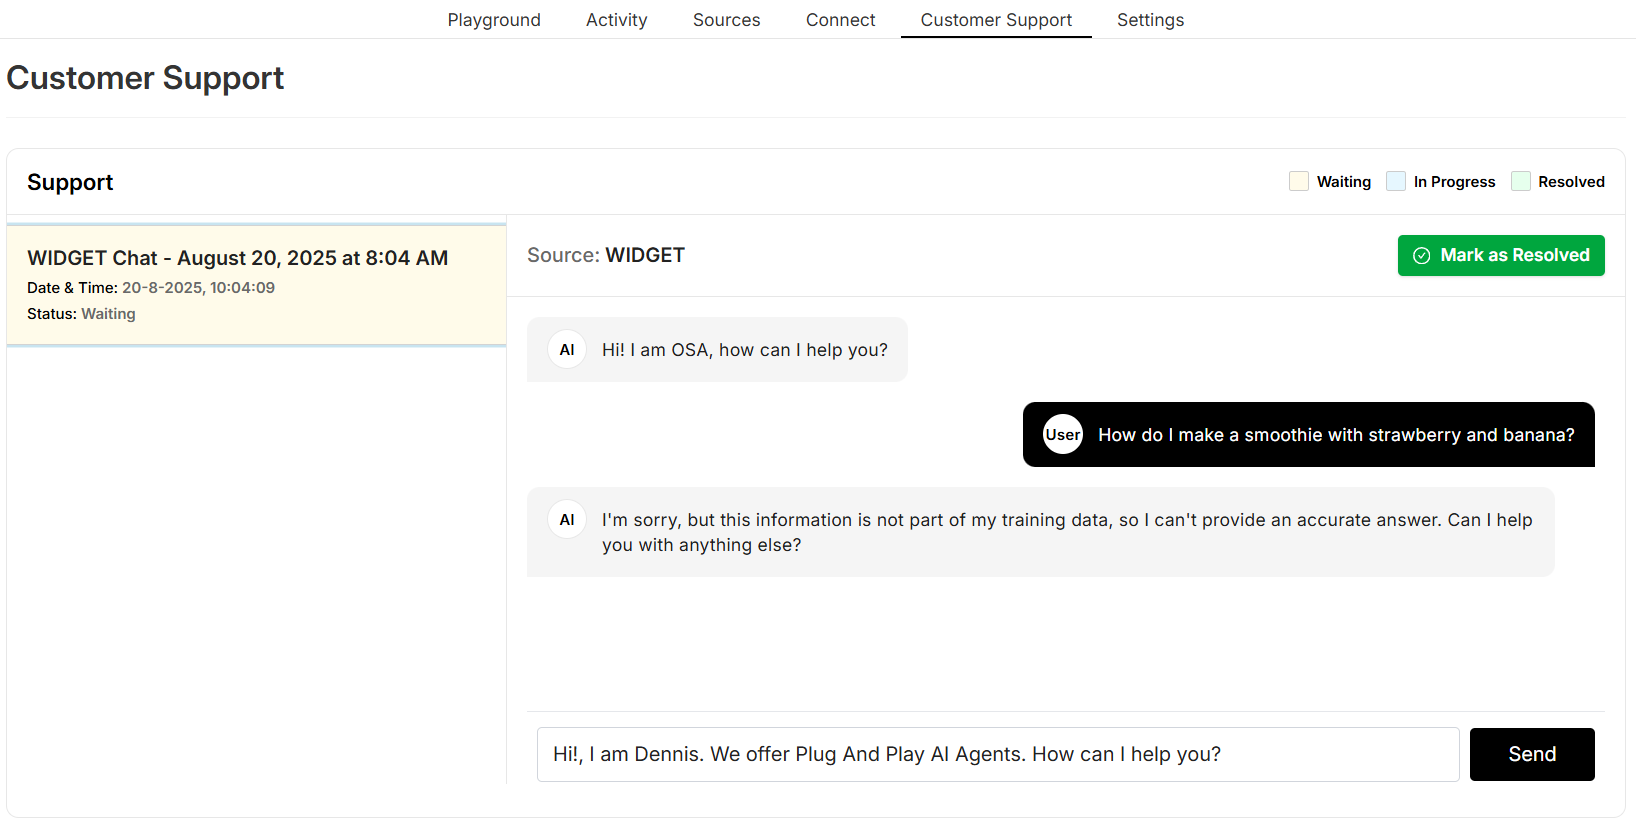
Customer Support
If your agent can't answer, it offers a human handoff. View these chats, respond directly, and mark as 'resolved' to let the agent take over again.
Customize with Settings
Tailor your agent's experience with the Settings tab:
- Chat Interface: Customize messages to match your brand. If your site is in Dutch, set a Dutch welcome message—or any language you prefer. Your agent automatically detects and switches to the user's language, a boon for our multilingual European audience!
Why This Matters for Your Business
As a European company based in the Netherlands, OneStopAgents.ai is built with SMEs in mind: offering a secure, compliant solution that respects your data (GDPR-compliant, of course!). Whether you're managing customer queries in Belgium or streamlining sales in Germany, this 5-minute setup saves you time and money.
Ready to Get Started?
Don't let manual tasks hold you back. Sign up for your free here and set up your first agent in just 5 minutes. No credit card required, and you're in control.